torek, 26. maj 2015

Masleni rogljički - Croissants

Že dolgo časa sem si želela narediti domače maslene rogljičke in zato sem se odločila, da jih ob prvi priložnosti, ko bom imela malo več časa obvezno naredim. In tako mi jih je med prvomajskimi počitnicami vendarle uspelo narediti. Razlog zakaj sem tako dolgo čakala, da jih naredim je ta, ker se mislila, da vzamejo morda kar preveč časa, vendar ko sem se jih lotila, sem ugotovila, da pravzaprav niso tako zapleteni in če se pravilno organiziraš, tudi tako zamudni niso. In čeprav vseeno vzamejo kar nekaj časa za pripravo in veliko več truda, kot če bi jih kupili v trgovini, so domači rogljički vredni vsake vložene minute in kapljice znoja. Naredila sem jih po receptu temu iz youtube-a, ki sem ga malo priredila in uspeli so mi zares čudovito. Če vam bo spodnji opis postopka povzročal težave vam absolutno priporočam ogled tega posnetka ali katerega drugega, za lažjo predstavo. 
P.S. Če želite jesti rogljiče v nedeljo za zajtrk se priprave lotite v petek popoldne ali v soboto zjutraj.


Sestavine
(približno 12 rogljičkov)

  • 125ml tople vode
  • 125ml toplega mleka
  • 50g sladkorja
  • 42g svežega kvasa ali 2 vrečki (7g) suhega kvasa
  • 500g gladke moke
  • 12g soli
  • 100g + 250g masla
  • 1 jajce
Postopek
  • Najprej zmešamo vodo, mleko, sladkor in kvas ter pustimo približno 5 minut, da se kvas razpusti in da malo vzhaja. 
  • V posodo presejemo moko in sol ter na sredini naredimo jamico, v katero prelijemo zmes s kvasom. Dodamo še zmehčanih 100g masla in zgnetemo testo (lahko na roke ali na mešalniku). Gnetemo približno 5-10 min, oziroma dokler testo ne postane mehko in prožno. Prestavimo ga v pomokano posodo in pustimo, da vzhaja na toplem prostoru približno 2 uri oziroma dokler se ni povečal za dvakrat.
  • Ko je testo vzhajalo, ga prestavimo na rahlo pomokano delovno površino in z rokami potlačimo in prepognemo po dolžini do dveh tretjin in tretjino preko prepognjenega testa ter zopet enako iz druge strani (za lažje razumevanje glej video v opisu ali spodnjo sliko). Testo zavijemo v folijo za živila in ga postavimo v hladilnik za vsaj 4 ure (če ste se jih lotili v soboto) ali čez noč (če ste se jih lotili v petek popoldne). 
  • Ko testo počiva, lahko pripravimo ploščico masla. Najlažje je, če ga pustimo nekaj časa na sobni temperaturi, ga nato narežemo na koščke in prestavimo v plastično vrečko ter oblikujemo ploščico velikosti 18x20 cm. Ko smo jo oblikovali, jo postavimo za eno uro v hladilnik oziroma dokler je ne potrebujemo.
  • Ko je testo vzhajano, ga vzamemo iz hladilnika in prav tako pa iz hladilnika vzamemo tudi maslo. Testo razvaljamo na pravokotnik velikosti 38x43 cm in nanj postavimo maslo ter spojimo stranice. 
  • Testo nato razvaljamo na pravokotnik velikosti 20x60 cm in ga prepognemo po dolžini do dveh tretjin in preostalo tretjino do tam kjer smo prepognili prvo konico testa ter nato prepognemo po polovici. To se imenuje "double turn".
  • Testo nato zopet razvaljamo na velikost 20x60 cm in prepognemo polovico testa do sredine in preostalo polovico čez prepognjeno. To pa se imenuje "simple turn". 
  • Zatem postavimo testo v hladilnik za eno uro.
  • Testo postavimo iz hladilnika in ga prerežemo na pol. Polovico postavimo nazaj v hladilnik, drugo polovico pa razvaljamo na pravokotni 23x46 cm, iz katerega nato izrežemo približno 6 trikotnikov, odvisno kako velike rogljičke želimo. Trikotnike nato zvijemo v rogljičke in jih prestavimo na peki papir. Enako storimo s preostalo polovico. Na tej točki lahko s pripravo prenehamo in damo rogljičke v skrinjo ali pa jih pustimo vzhajati.
  • Jajce stepemo z malo mleka ali vode in z njim premažemo rogljičke. Rogljički naj nato vzhajajo 3 ure (če ste se jih lotili v petek popoldne) ali čez noč (če ste se jih lotili v soboto zjutraj).
  • Pečico segrejemo na 200° C. Rogljičke zopet premažemo s stepenim jajcem in jih pečemo 10 minut na 200° C in nadaljnjih 15 min na 180° C.


English version

I've been wanting to make croissants for a very long time now and during the school holidays I've finally managed to find the time to make them. I always thouht that making my own croissants would take absolutly too much time, but now that I've made them I realizeed that they aren't as time consuming and complicated as I thought. And even though they do take some time to make they are without a doubt worth every minute of efford you put into them. I chose this recipe from youtube and they were absolutly wonderful. I recommend watching this video or any other video describing the procedure, just so you can get a better idea of how to turn the dough.
P.S. If you want to make croissants you should start making them a day and a half or two days ahead.

Ingredients
  • 125ml warm water
  • 125ml warm milk
  • 50g sugar
  • 42g fresh yeast or 2 packs (7g) dry yeast
  • 500g bread flour
  • 12g salt
  • 100g +250g butter
Procedure
  • Combine the water, milk, sugar and yeast. Mix well and leave the mixture for 5 minutes, so that the yeast can activate.
  • Sieve the flour into a mixing bowl add the yeast mixture, salt and 100g of butter. Knead the dough for about 5-10 minutes or until it becomes soft and elastic (you can use a mixer or your hands). Flour the dough and cover it with plastic foil and let it rise for 2 hours or until it has doubled in size.  
  • When the dough has risen transfer it onto a floured work surface and pat it down a bit. Fold the dough length wise up to the two third of the dough and then the remaining third of the dough over the folded one. And then do the same from the other side (watch the video for an easier understanding of this step). Wrap the dough in foil and refrigerate for at least 4 hours (if you started making them a day and a half ahead) or overnight.
  • Now you can prepare the slob of butter. The best way to do this is to cut the butter into smaller pieces and leave them at room temperature for about an hour. Then transfer them into a plastic bag and form a 7x8 inch rectangle. Then refrigerate the butter until needed.
  • Remove the dough from the refrigerator and roll it out into 8x15 inch rectangle and place the butter on one half and fold over the other half of the dough and seal the edges. Then roll out a 8x24 inch rectangle. When you have reached the perfect size, fold the dough length wise up to two thirds and the remaining third up to the folded dough. Then readjust the thickness of the dough and fold in half. This is called a double turn.
  • Roll the dough again into a 8x24 inch rectangle and fold one third of the dough up to two thirds and the remaining third over the folded dough. This is called a simple turn.
  • Refrigerate the dough for one hour. 
  • Meanwhile prepare the egg wash. Whisk the egg with a bit of water or milk and that's it.
  • Remove the dough from the refrigerator and cut it in half. Put one of the halves back to the refrigerator and roll out the other one into a 9x18 inch rectangle and cut it into 6 triangles then roll the triangles into croissants and put them on a baking sheet and brush the croissants with egg wash. Repeat the same steps with the other half of the dough. At this point you can freeze the croissants or continue with the preparation.
  • Let the croissants rise for 3 hours (or overnight if you started making them a day and a half ahead) and then brush them with egg wash again before baking. 
  • Preheat your oven to 200° C. Bake the croissants for 10 minutes on 200° C an for another 15 minutes on 180° C. 


nedelja, 24. maj 2015

Čokoladna torta z jagodami - Strawberry chocolate cake

Sezona jagod je v polnem teku in z njo tudi sezona jagodnih slaščic. Ta sočna in okusna tortica je zares preprosta in hitro pripravljena, zato je to odličen recept za sladico za med tednom. Torto lahko seveda naredite tudi s kakšnim drugim sezonskim sadjem, v biskvit pa lahko dodate tudi kakšne oreščke ali kokos. Recept je malo prirejen po receptu Jamieja Oliverja, njegov recept pa si lahko ogledate tukaj.


Sestavine
(za torto premera 26cm)

Biskvit:
  • 200g sladkorja
  • 200g masla
  • 200g moke
  • 3 jajca
  • 1 jedilna žlica pecilnega praška
  • 3 jedilne žlice kakava (zmešanega s 5 žlicami vode)
  • ščepec soli
Nadev:
  • 200ml sladke smetane
  • 200g maskarponeja
  • 50g sladkorja
  • 250g jagod
  • sok 1 limone
  • 1dcl mleka
Preliv:
  • 150g čokolade
  • 150ml sladke smetane
  • 50g masla


Postopek
  • Najprej prižgemo pečico na 180° C.
  • Penasto umešamo sladkor in maslo. Mešanici dodamo rumenjake, moko, pecilni prašek in raztopljen kakav in premešamo v homogeno zmes.
  • Beljake stepemo s ščepcem soli v sneg, ki ga vmešamo v čokoladno zmes v dveh korakih. 
  • Zmes prestavimo v namaščen pekač in pečemo približno pol ure, če je biskvit pečen preverimo z zobotrebcem - če na zobotrebcu ni vlažne zmesi, je biskvit pečen. Ko je biskvit pečen, ga vzamemo iz pečice in pustimo, da se ohladi. V tem času pripravimo nadev.
  • Opremo in očistimo jagode ter jih narežemo na manjše koščke. Jagode posujemo s sladkorjem in sokom limone ter jih premešamo. Nekaj jagod si lahko prihranimo za stransko okrasitev (približno 10), vendar to ni nujno. Za nadev stepemo sladko smetano in ji nato dodamo maskarpone. 
  • Ohlajen biskvit prerežemo na pol, če imate raje tanjše plasti pa biskvit prerežite na tri dele. Biskvit navlažimo z malo mleka in sokom, ki so ga spustile jagode. Okoli biskvita nato nastavimo obod in acetatno folijo, na rob pa razporedimo jagode. Na biskvit namažemo približno polovico kreme in z njo zapolnimo tudi prostor med jagodami. Na kremo nato razporedimo narezane koščke jagode, na njih pa še preostanek kreme. Navlažimo še drugo polovico biskvita in z njo prekrijemo kremo. Če ste biskvit prerezali na tri dele, zadnje dva koraka ponovimo še enkrat. Torto nato postavimo v hladilnik za vsaj 2 uri (ali za 1 uro v zamrzovalnik), potem pa jo lahko prelijemo s prelivom.
  • Za preliv zavremo sladko smetano in jo prelijemo čez čokolado. Zmes premešamo, da se čokolada raztopi in ji dodamo narezano maslo. Ko se zmes ohladi, jo lahko prelijemo čez torto.
  • Torto nato zopet postavimo v hladilnik za 1 uro, nato pa jo lahko postrežemo in uživamo.

English version

The season of strawberries is in full swing and therefore so is the season of strawberry desserts. This moist and delicious cake is very easy and quick to make so it makes for a great work week dessert. You can make it with any berries you like or even some other fruits, or add some nuts  or coconut to the cake batter. You can find the original recipe here, but this recipe is a bit diffrent from the original Jamie Oliver's recipe.

Ingredients
(for a 26cm diameter cake)

Cake batter:
  • 200g butter
  • 200g sugar
  • 200g flour
  • 3 eggs
  • 1tbs baking powder
  • 3tbs cocoa powder (mixed with 5 spoons of water)
  • pinch of salt
Filling:
  • 200ml whipping cream
  • 200g mascarpone cheese
  • 50g sugar
  • 250g strawberries
  • juice of 1 lemon
  • 100ml milk
Topping:
  • 150g chocolate
  • 150ml whipping cream
  • 50g butter

Procedure
  • Preheat your oven to 180° C.
  • Mix the butter and sugar and then add the egg yolks, cocoa powder, flour and baking powder. In a seperate bowl whisk the egg whites with a pinch of salt and then add the to the butter mixture in two additions. 
  • Put the mixture in a buttered cake tin and bake for about 30 minutes. You can check the cake if it's baked with a tooth pick - if it comes out with no raw batter on it, it's baked. Let the cake cool and prepare the filling.
  • Slice the strawberries into smaller pieces and put them in a bowl. Add the sugar and lemon juice. If you want you can put side some halfed strawberries for the decoration (about 10 strawberries). In a seperate bowl whip the cream and then add the mascarpone cheese.
  • Cut the cake in half or if you preffer into three pieces and moist it with milk and juice from the strawberries. Line the cake with some acetate foil and a tin. Then line the outside of the cake with strawberry halves. Spread half of the filling and the sliced strawberries on the cake and top them with the remaining filling and cake. Refrigerate the cake for about an hour or two or put in a freezer for an hour.
  • For the topping bring the cream to a boil and pour it over the chocolate. When the chocolate has melted add the butter and let the mixture cool.
  • Remove the cake from the refrigerator and pour the topping over it. Then refrigerate the cake for another hour before serving.


ponedeljek, 27. april 2015

Sadne košarice - Fruit pies

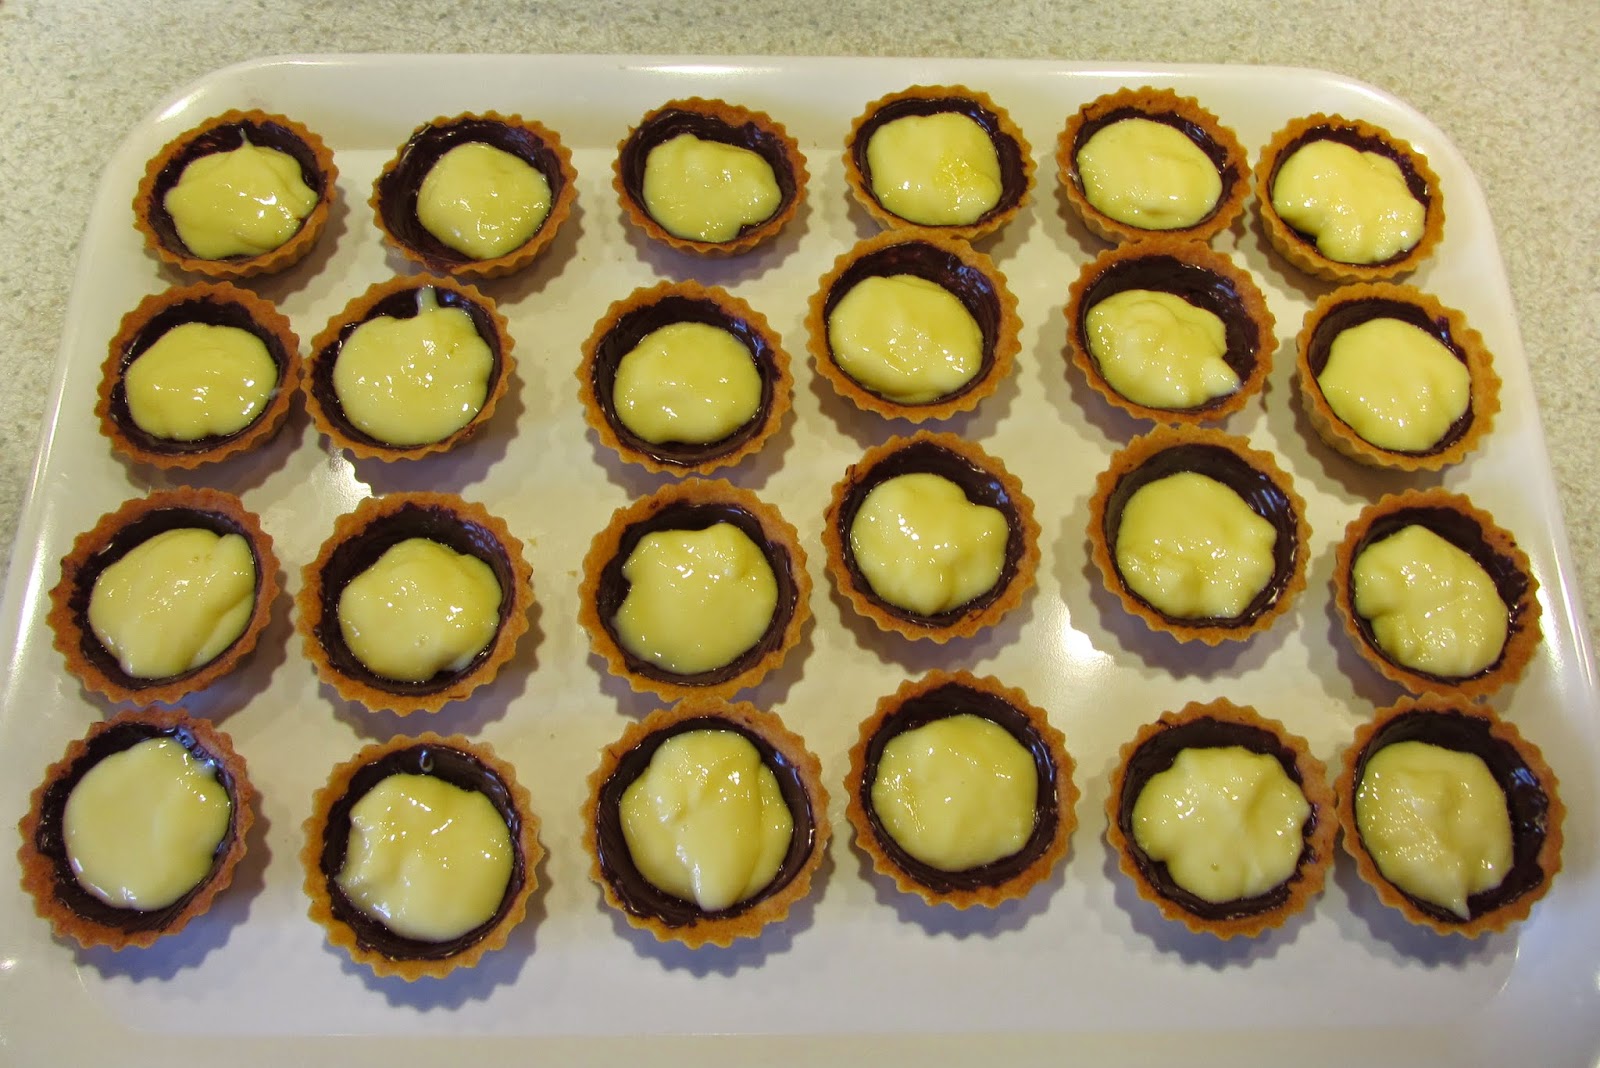
Počasi se že začenjajo toplejši meseci, ko si zaželimo bolj osvežilnih sladic in sadne košarice so odlične za ta čas, ko je na voljo tudi veliko svežega sadja. Danes sem se odločila za kombinacijo jagod in borovnic, uporabimo pa lahko katero koli vrsto sezonskega sadja ali pa sadje iz kompota. Nadev sem danes pripravila iz vanilijevega pudinga, velikokrat pa naredim tudi domačo vanilijevo kremo ali čokoladno kremo - ganache. Sadne košarice so odlična ideja za majhen posladek po kosilu, postrežemo pa jih lahko tudi na zabavi ali vzamemo s seboj na piknik. Recept je povzet po receptu objavljenemu v reviji OK izpred nekaj let.


Sestavine
(za približno 40 košaric)

Testo:
  • 250g masla 
  • 200g sladkorja v prahu
  • 500g moke
  • 4 rumenjaki
  • 3 žlice kisle smetane
  • ščepec soli
Nadev:
  • 2 zavitka vanilijevga pudinga
  • 1l mleka
  • 6 žlic sladkorja
  • 150g čokolade
  • približno 300g sadja

Postopek
  • Vse sestavine za testo hitro umesimo, da se povežejo. Testo lahko umesimo z mešalcem ali pa na roke, važno je le to, da ga ne pregnetemo preveč, saj potem ne bo tako okusno. Testo pokrijemo in postavimo v hladilnik ter ga pustimo počivati, vsaj pol ure.
  • Ohlajeno testo razvaljamo, ga razrežemo na krogce s pomočjo noža ali kozarca in ga položimo v namaščene modelčke (če so modelčki silikonski, jih ni potrebno namastiti). Testo z vilicami nekajkrat prebodemo, nato pa modelčke zopet postavimo na hladno za približno 1 uro (jaz jih velikokrat postavim kar v zamrzovalnik za 20 minut oz. dokler ni testo trdo). 
  • Pečico segrejemo na 180° C. Ko se je testo malo strdilo, modelčke postavimo v pečico in pečemo približno 20 minut oz. dokler ne dobijo lepe rumeno-rjave barve. Spečene košarice postavimo iz pečice in pustimo, da se ohladijo.
  • Nad paro raztopimo čokolado in z njo premažemo ohlajene košarice. Med tem ko čakamo, da se čokolada strdi, lahko naredimo nadev.
  • Za nadev skuhamo puding po navodilih na vrečki ali pa naredimo domačo vanilijevo ali čokoladno kremo. Ko je nadev skuhan, čezenj položimo folijo za živila, da se na vrhu ne more izsušiti. Malo ohlajeno kremo nato nadevamo v košarice.
  • Operemo, osušimo in narežemo sadje, da bo primerne velikosti za košarice in ga položimo na nadev. Če želimo, lahko sadje premažemo z malo segrete marmelade, da bo sadje izgledalo še bolj privlačno.
  • Košarice lahko postrežemo takoj ali pa jih za nekaj časa postavimo v hladilnih in postrežemo ohlajene. 

English version

The warmer months are just around the corner and they are calling for some refreshing delights. These little fruit pies are just perfect for this time, when it's a bit hotter outside and there are more delicious fresh fuits available. I chose a combination of strawberries and blueberries, but you can use any combination of fresh of canned fruits. For the filling I made vanilla pudding, but usually a use homemade vanilla pastry cream or ganache. The pies are great for a light desert after lunch, but you can also make them for a party or a picnic. This recipe is made after a recipe from a Slovenian magazine.

Ingredients
(for about 40 little pies)

Dough:
  • 250g butter
  • 200g powdered sugar
  • 500g flour
  • 4 egg yolks
  • 3tbs sour cream
  • pinch of salt
Filling:
  • 2 packs of vanilla pudding
  • 1l milk
  • 6tbs of sugar
  • 150g chocolate
  • about 300g fruit
Procedure
  • Mix all the ingredients for the dough until they are all combined. You can use a mixer or make the dough by hand, just make sure you don't over mix. Cover the dough and let it rest in the refrigerator for at least a half an hour.
  • Roll out the dough and cut out little circles using a knife or a glass. Put the dough in to the tins, and make some holes in the dough with a fork. Put the tins in the refigerator of a frezzer to speed the proces. 
  • Heat the oven to 180° C and when the dough is firm, bake the pies for about 20 minutes or until they have a nice yellow colour. When they are baked, let them cool and prepare the chocolate.
  • Melt the chocolate over a pan of simmering water and then brush the pies with the melted chocolate and let them cool.
  • Prepare the filling - from the instructions on the pack of the vanilla pudding, let it cool and then put it in the pies.
  • Wash, drain and cut the fruit and place it over the filling. If you want you can brush some marmelade over the fruit to make it more appealing.
  • Serve the pies as they are or refrigerate them and then serve them cool.


ponedeljek, 16. marec 2015

Cimetove rolice - Cinnamon Buns

Cimetove rolice so odlična ideja za pozen zajtrk ali sladko popotnico za na pot. To je recept za prave ljubitelje cimeta in mehkih peciv, ki se kar topijo v ustih. Rolice so seveda najboljše še malo tople, vendar pa vas bodo vseeno počakale že ohlajene naslednji dan, če jih seveda prej ne bo že zmanjkalo. Na recept sem naletela, ko sem iskale ideje za peciva za popotnico za daljše potovanje z avtom in se na koncu tudi odločila, da naredim te prečudovite cimetove rolice.


Sestavine
(za približno 12 rolic)

Testo:
  • 245ml mleka
  • 75g masla
  • 7g suhega kvasa ali 21g svežega kvasa
  • 100g sladkorja
  • 600g moke
  • 1 žlička soli
  • 3 jajca
Nadev:
  • 220g rjavega sladkorja
  • 3 žlice moke
  • 2 žlici cimeta
  • 130g masla (sobne temperature)
Preliv:
  • 300g mletega sladkorja
  • 60g masla
  • 2 žlici mleka
  • ščepec soli

Postopek
  • Mleko zavremo in odstavimo. Maslo razrežemo na manjše koščke in ga dodamo mleku ter malo pomešamo, da se maslo razpusti.
  • V posodi zmešamo polovico moke, sladkor, kvas in sol. Dodamo jajca, mešanico masla in mleka ter dobro umešamo. Mešanici postopoma dodajamo preostalo polovico moke po 50g in vmes vedno dobro premešamo. Ko smo dodali vso moko, testo gnetemo še nadaljnjih 5 minut (lahko z mešalcem ali na roke). Ko testo postane mehko in prožno, ga pokrijemo in pustimo počivati 20 minut, vmes pa lahko pripravimo nadev.
  • Vse sestavine za nadev dobro zmešamo in pustimo na sobni temperaturi dokler ga ne potrebujemo.
  • Ko je testo vzhajano, ga razvaljamo na pravokotnik (cca 22cm x 30cm) in enakomerno premažemo z nadevom. Testo zvijemo po dolžini kot rolado in ga narežemo na približno enako velikih 12 rolic. Rolice prestavimo v namaščen pekač ali pekač obložen s papirjem za peko in jih pustimo vzhajati vsaj 5 ur v toplem prostoru ali pa čez noč v hladilniku, v tem primeru je rolice potrebno vzeti iz hladilnika vsaj 1 uro pred peko.
  • Rolice pečemo na 180 ° C približno 20 minut oziroma dokler ne dobijo lepe rjave barve.
  • Ko so rolice pečejo pripravimo preliv, za katerega preprosto umešamo skupaj vse potrebne sestavine. Preliv polijemo na rahlo ohlajene rolice, ki jih postrežemo še tople.


English version

Cinnamon rolls are the perfect idea for brunch or for a snack for the road. This recipe is for all you cinnamon lovers and for those of you who love soft and melt-in-your-mouth goodies. Rolls are best served still a bit warm but they are still delicious the next day if they'll wait that long. I found this recipe while searching for ideas for snackes for a roadtrip and eventualy dicided to bake these cinnamon rolls.

Ingredients
(for about 12 rolls)

Dough
  • 245ml milk
  • 75g butter
  • 7g dry yeast
  • 100g sugar
  • 600g flour
  • 3 eggs
  • 1tsp salt
Filling
  • 220g brown sugar
  • 3tbs flour
  • 2tbs ground cinnamon
  • 130g butter (room temperature)
Glaze
  • 300g confectionars sugar
  • 60g butter
  • 2tbs milk
  • pinch of salt

Procedure
  • Heat the milk until it bubbles, then remove it from heat. Stir in butter and mix until melted. Let cool a bit.
  • In a mixing bowl combine half the flour, sugar, yeast and salt. Add eggs and the milk and butter mixture. Add the remaining flour 50g at a time ans stirring well after each addition. After incorporating all the flour knead the dough for about 5 minutes. Cover the dough and let it rest for 20 minutes.
  • While the dough is resting prepare the filling. Combine and mix all the ingredients for the filling and leave it on room temperature until needed. Roll out the dough into a 9x12 inch (22x30cm) rectangle. Spread the filling on the rolled out dough and roll up the dough from the long end. Cut the dough into 12 equal rolls and place them in a baking tin. Let the rolls rise for at least 5 hours on room temperature or in a refrigerator over night (if you leave them to rise over night, remove the rolls from the refrigerator at least 1 hour before baking).
  •  Preheat oven to 375 degrees F or 180 degrees C. Bake the rolls for 20 minutes or until brown.
  • Meanwhile, whisk together the ingredients for the glaze. Remove rolls from the oven and pour the glaze over them.